

Description V-CAD 60
Quick and precise measurement – simple and intuitive
Can any employee operate your measuring device today?
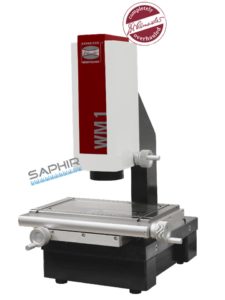
We’ll show you how! The new V-CAD 60 with M3 combines a compact, mobile and precise measuring device with simple and intuitive software interface of the M3 measurement software – for measurements at the touch of a finger! The V-CAD 60 leaves nothing to be desired. Simply position the workpiece anywhere in the image field, touch the screen of the multi-touch panel PC to start the measurement and, in a matter of seconds, you have the final measurement and related report – quick – uncomplicated – reproducible and with a precision that sets standards in this class. The V-CAD 60 is now also available with the award-winning SAPHIR QD measurement and analysis software. Measurements with SAPHIR QD are simple: The part is placed anywhere on the glass plate, within the measurement range, automatically identified and then measured. Information, in the form of tables and graphics superimposed over the live image, is provided as standard – highlighted in colour for easy recognition of good and bad results. For more information, see section: Software / SAPHIR QD.
Intuitive measurement made easy
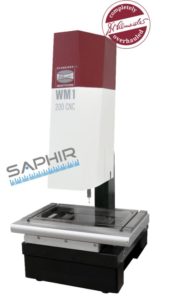
Measurements don’t get much quicker or simpler than this. Choose the single-image field system of the V-CAD 60 (this covers a measuring range of up to 65 x 55 mm, without table movement), or the larger variant with moving table (V-CAD 300) and measuring volume of up to 300 x 200 mm that can alternatively also be used in fully automated CNC mode. Here you have a whole host of options when it comes to your 2D measurements. Decades of experience in building high-precision multi-sensor measuring machines have been incorporated into the developing and production of the V-CAD Series. You can count on us – Made by Schneider Messtechnik – Made in Germany – SIMPLY PRECISE!
Standard configuration of the V-CAD 60
- 5 megapixel CCD b/w camera
- Telecentric 4-step motor zoom
- 4 different image fields for precise measurement
- Telecentric LED transmitted light illumination
- LED ring light illumination for incident light measurement
- Multitouch panel PC with WIN7
- LAN and WLAN network interface
- M3 measurement software or SAPHIR QD measurement and analysis software
- Works calibration certificate
- Granite/aluminium sandwich design
Highlights of the V-CAD 60
- Automatic recognition of control geometries without pre-selection
- No alignment of workpieces in the image field
- 4-step motor zoom for precise measurement of even the smallest features
- Measurements every second
Options of the V-CAD 60 with M3
- DXF overlays
- QS-stat interface


